YOLOv11: How to Train for Object Detection on a Custom Dataset
Object detection is one of the most exciting and widely-used applications of deep learning and computer vision, and YOLO (You Only Look Once) has been a revolutionary model in this field. The latest version, YOLOv11, promises faster, more accurate object detection, making it an ideal tool for custom applications. In this guide, we’ll walk you through training YOLOv11 for object detection on your custom dataset using Roboflow, a powerful platform for preparing and managing image datasets.
Why YOLOv11?
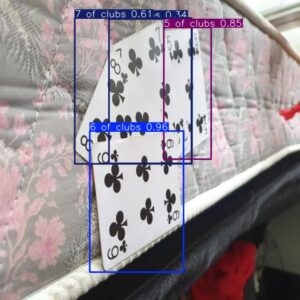
YOLO models have gained popularity because they achieve both real-time detection speeds and impressive accuracy. YOLOv11, the latest iteration, builds on these strengths with improvements in detection accuracy and processing speed. It is optimized for tasks where you need to balance both real-time performance and high precision—such as in self-driving cars, surveillance, or even mobile applications.
Step-by-Step Guide to Training YOLOv11 for Object Detection
1. Setting Up YOLOv11 Environment
Before we start training YOLOv11, ensure you have the required environment set up. The following software and hardware are required for smooth training and detection:
– Python: Make sure you have Python 3.7+ installed.
– PyTorch: YOLOv11 is implemented in PyTorch, so you need to have it installed.
– CUDA (optional but recommended): A compatible NVIDIA GPU with CUDA enabled can significantly speed up training.
Install the necessary dependencies using pip:
“`bash
pip install torch torchvision matplotlib numpy opencv-python
“`
2. Gathering and Preparing the Dataset with Roboflow
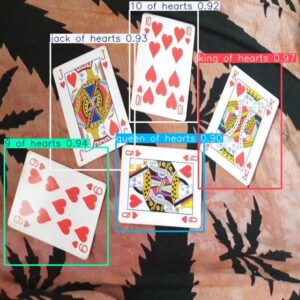
Roboflow is a powerful tool for collecting, annotating, and managing datasets for machine learning. You can either upload your own dataset or explore Roboflow’s public dataset repository for your object detection task.
Steps to use Roboflow for dataset preparation:
1. Sign Up or Log In to Roboflow.
2. Create a Project for your custom object detection task (e.g., detecting traffic signs, animals, etc.).
3. Upload Your Images: You can upload your own dataset, or search for publicly available datasets in Roboflow’s repository.
4. Annotate Your Images: Roboflow allows easy annotation using bounding boxes. You can also use existing annotations if they are available.
5. Select YOLO Format: After annotating, choose the dataset format. Roboflow supports direct export to YOLO format (YOLOv11 uses the same annotation format as previous YOLO versions).
6. Download the Dataset: Download your dataset in YOLO format, which will include images and corresponding annotation files (usually `.txt` files).
3. Configuring YOLOv11 for Custom Dataset
Once you have your dataset ready, you need to configure YOLOv11 to work with your custom dataset. The following steps will guide you through the setup:
a. Data Preparation
Ensure that your dataset folder contains the following:
– Images: Stored in a folder like `images/train`, `images/val`, etc.
– Labels: Annotation files in `.txt` format stored in `labels/train`, `labels/val`.
– Classes File: A `.yaml` file that defines your class names and the paths to your training and validation images.
Here’s a sample of how the `.yaml` file should look:
“`yaml
train: ./datasets/my_dataset/images/train
val: ./datasets/my_dataset/images/val
nc: 3 Number of classes
names: [‘dog’, ‘cat’, ‘rabbit’] Class names
“`
b. Model Configuration
In YOLOv11, you need to specify a model configuration file. This file will dictate how YOLOv11 handles layers, input dimensions, and the number of classes. You can use a pre-defined YOLOv11 configuration or modify it based on your needs.
Look for the configuration file for YOLOv11 (e.g., `yolov11_custom.yaml`), which should be included with the YOLOv11 repository. Adjust the file to match your dataset, especially the number of classes (`nc`).
4. Training YOLOv11 on Your Custom Dataset
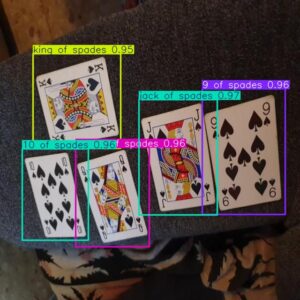
With your dataset and configuration ready, it’s time to start training YOLOv11.
Navigate to the YOLOv11 repository directory and run the following command to start training:
“`bash
python train.py –img 640 –batch 16 –epochs 50 –data ./data/my_dataset.yaml –weights yolov11.pth –device 0
“`
Explanation of parameters:
– `–img 640`: Specifies the input image size (640×640 is common).
– `–batch 16`: Sets the batch size. You may need to reduce this if you have limited GPU memory.
– `–epochs 50`: Number of epochs (adjust based on dataset size).
– `–data`: Path to your dataset `.yaml` file.
– `–weights`: Pre-trained weights for YOLOv11. Starting with pre-trained weights helps achieve better accuracy faster.
– `–device 0`: Specifies the GPU device (use `cpu` if no GPU is available).
5. Monitoring Training Progress
As the training progresses, you will see metrics such as loss, mAP (mean average precision), and accuracy displayed in the console. YOLOv11 uses a combination of precision and recall metrics to assess detection quality.
You can also visualize the training progress using TensorBoard:
“`bash
tensorboard –logdir runs/train
“`
6. Evaluating and Fine-Tuning the Model
After training is complete, you’ll want to evaluate the model’s performance on the validation set. YOLOv11 provides metrics like mAP, precision, and recall to give you insights into how well the model detects objects in your dataset.
If you’re not satisfied with the initial performance, consider:
– Increasing Epochs: If your model is underfitting, running more training epochs may improve performance.
– Adjusting Hyperparameters: Play with learning rates, batch sizes, and optimizer settings.
– Data Augmentation: Roboflow provides augmentation options, such as flipping, cropping, or adjusting brightness to create more training variety.
7. Testing YOLOv11 on New Images
Once you’re happy with your trained model, you can start testing it on new images or videos to see how well it detects the objects in your custom dataset.
Run the following command to detect objects on a new image:
“`bash
python detect.py –weights runs/train/exp/weights/best.pt –img 640 –conf 0.25 –source ./images/test.jpg
“`
– `–weights`: Path to the trained YOLOv11 weights.
– `–img`: Image size.
– `–conf`: Confidence threshold for detection.
– `–source`: The image or video file on which you want to run detection.
8. Deploying Your YOLOv11 Model
You can deploy your trained YOLOv11 model on a variety of platforms, such as:
– Web: Using Flask or FastAPI to serve the model as a web application.
– Mobile: Use YOLOv11 with ONNX or TensorFlow Lite for mobile inference.
– Edge Devices: Deploy on edge devices like Raspberry Pi or NVIDIA Jetson for real-time object detection.
Conclusion
Training YOLOv11 for object detection on a custom dataset is a powerful way to build AI models tailored to your specific needs. With tools like Roboflow, dataset preparation becomes simple and efficient. Follow the steps in this guide to go from dataset collection to real-time object detection, whether for personal projects or large-scale applications.
Key Takeaways:
– YOLOv11 provides excellent real-time performance for object detection tasks.
– Roboflow simplifies dataset preparation and annotation for custom models.
– Training involves configuring the model, adjusting hyperparameters, and monitoring performance metrics.
– Fine-tuning and testing are crucial steps for achieving high accuracy.
Happy training, and good luck with your custom object detection project!